How to Add Ninja Form Submission as Google Analytic 4 Event?
Andrew McMenamy
November 28th, 2022
This article is part of the Tommy Cat Media quick-fire series, which discusses key marketing concepts and applications tailored to specific industries in under 800 words.
For those who are not familiar with Ninja Forms, they are a plugin on WordPress that allows you to create submission forms so you can collect information from your website visitors.
Google Analytics 4 is Google’s most recent version of Google Analytics. It focuses on your website, apps, and mobile performance. For the sake of the tutorial, I will assume you already have GA4 set up on your website.
So out of the box, Google Analytics has difficulty tracking Ninja Forms. It seems that Google is unable to pick up some of the JavaScript that Ninja Form uses. So this tutorial we’ll do a workaround to get it to work.
Step 1
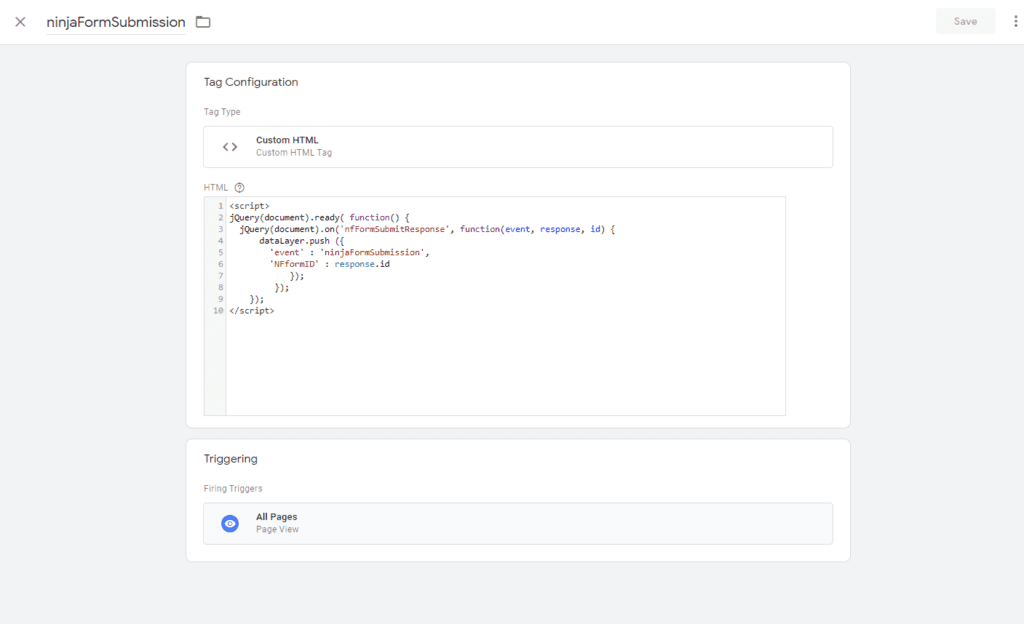
Log into Google Tag Manager and “tag” on the sidebar. Click add new “tag”. **You can name this tag whatever you want but be mindful of the name conventions of your “tags” and “triggers” because they all rely on each other. I named the tag “ninjaFormSubmission”.**
***For the sake of the tutorial, I suggest naming everything the same as I have it, you can go back and fix everything once it works correctly.***
For tag type, select custom HTML. You should see an empty HTML box appear right below it. Enter the following script below.
When you submit a Ninja Form, Google can only pick up the string of code “ninjaFormSubmission”. This JavaScript code tells Google Tag Manager, “Hey, I think we have something here”.
Make sure you set the triggering setting as “all pages”. If you have a Ninja Form on only one page, you can set this option to that specific page, if you want.
Step 2
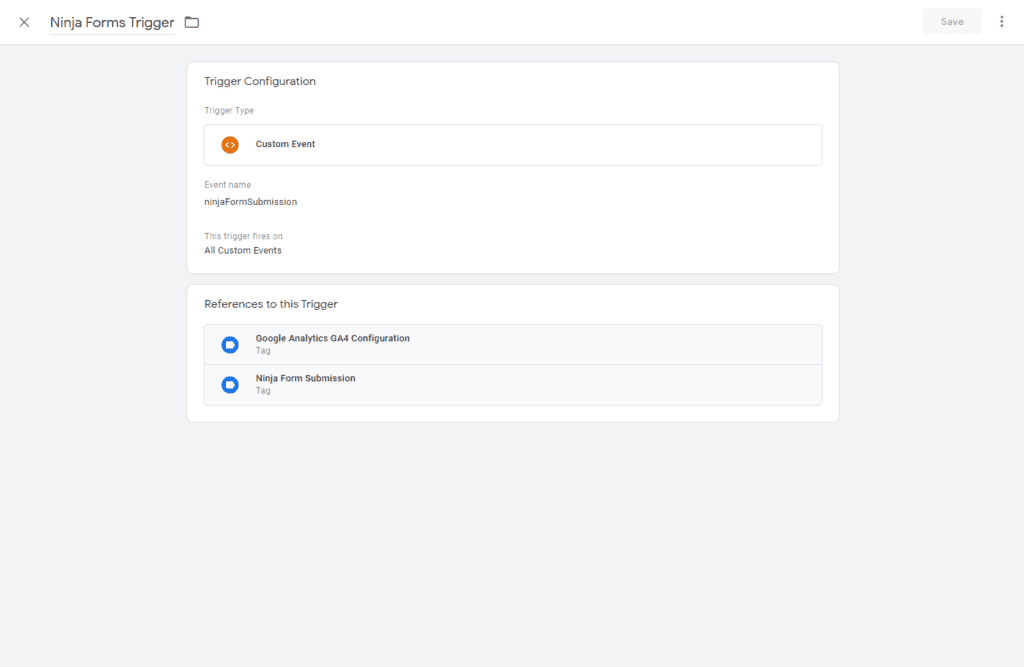
From the sidebar, click “Triggers”. You should see all the triggers made for your website. Click “new”. Name this trigger whatever you want. I named it “Ninja Forms Trigger”.
Set this new trigger as “Custom Event”. For the event name, use “ninjaFormSubmission”. For the “This trigger fires on” prompt, select “All Custom Events”.
In this step, the trigger recognizes Google Tag Manager picking up the Ninja Form Submission. This trigger then sends a message to Google Analytics, saying “we have an event coming your way”. This event is going to be created in the next step.
Step 3
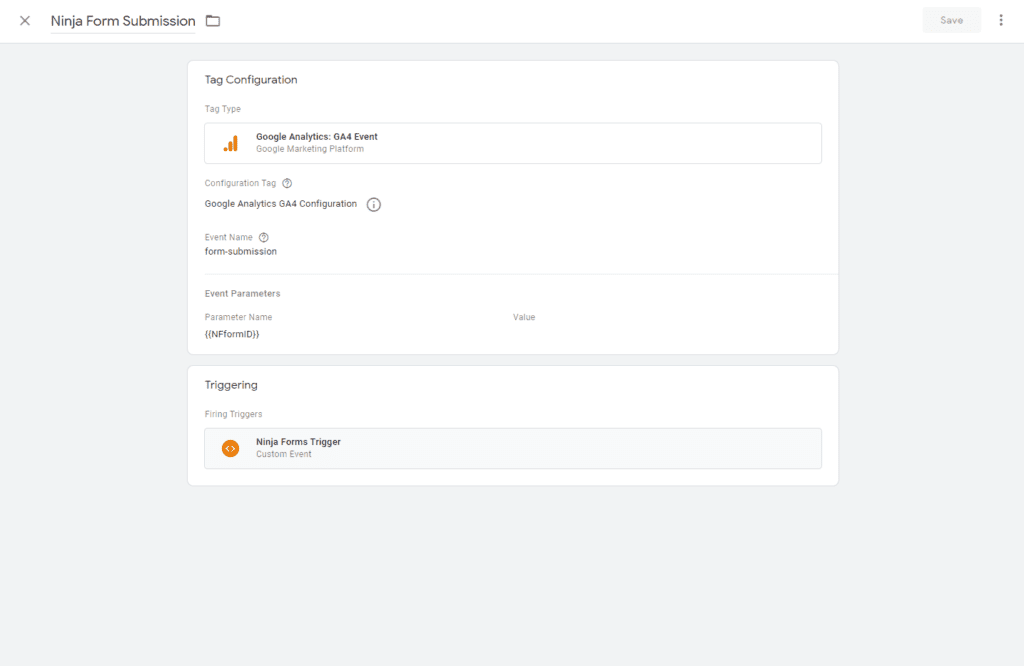
Go back to your tag page and create a new tag. Name it whatever you want. I named this tag “Ninja Form Submission”. Set the tag type as “Google Analytics: GA4 Event”. If your Google Analytics script is loaded onto your site using Google Tag Manager, you should have a tag already created named “Google Analytics GA4 Configuration” or something of that sort. You should see that populate the “Configuration Tag” below.
For the event name, I named it form-submission. This is the name of the event that will show up in Google Analytics.
I also created an event parameter called {{NFformID}}. This allows Google Analytics to identify which form made the submission. This step is totally optional. I’ll show you how to do this in the next step.
For Triggering, select the trigger you created in step 2.
Step 4
So Google Analytics needs help telling you which form the submission is coming from. We need to create a variable.
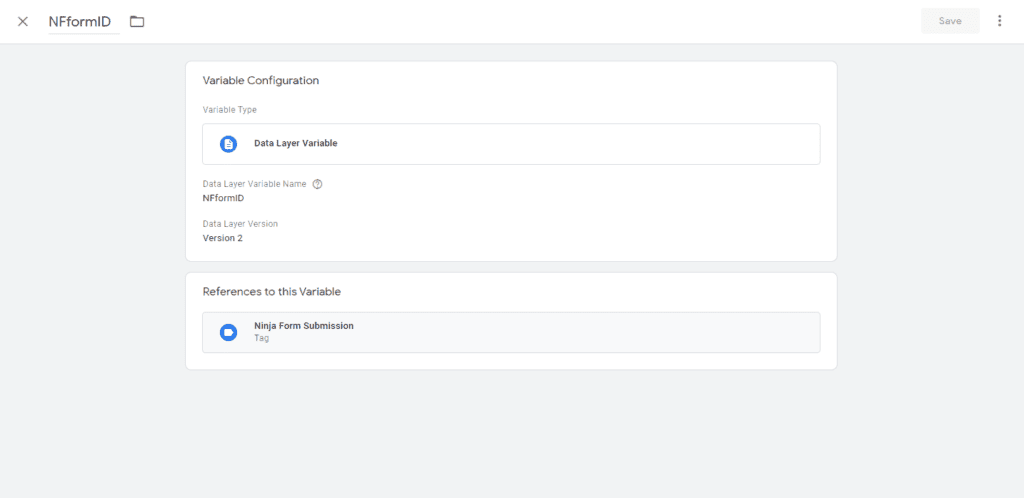
Click “Variable” from the sidebar menu. Scroll to the bottom of the page to the “User-Defined Variables” section. Click on “new”.Name the variable “NFformID”.
Set the variable type as “Data Layer Variable”.
Then adjust the “Data Layer Variable Name” to “NFformID”.
Leave the “Data Layer Version” as “Version 2”.
You have created your data variable.
Step 5
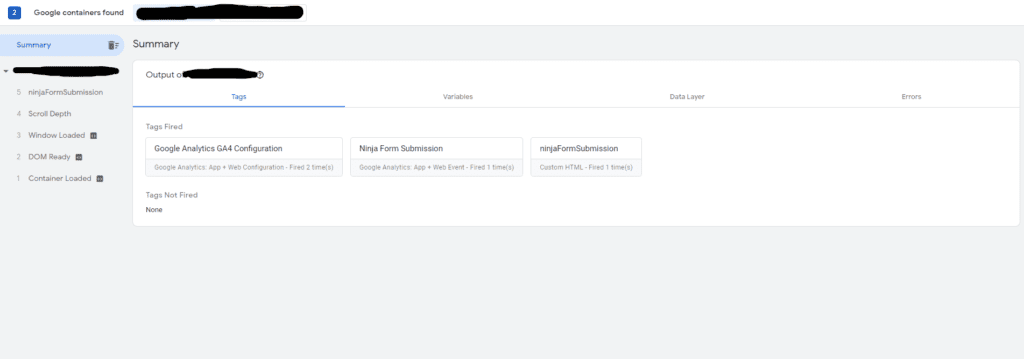
If you look to the top right corner of the webpage, you should see a preview button. Click this button and it should allow you to see your website in debug mode.
If your tags are not firing correctly, make sure your naming conventions are correct. Re-read the tutorial and make sure you didn’t miss a step.
Step 6
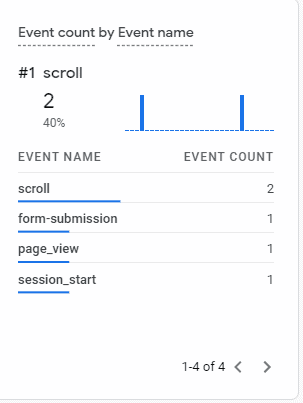
Go check Google Analytics 4. Find your real-time overview. You should see a web session being tracked. If you look at the “Event Count by Event Name” report, you should see your event name labeled in step 3 visible. This is how you know everything worked out properly.
If you check the “Event” tab on the side menu, you will notice that the form submission event isn’t showing up. Don’t freak out. Currently, there is a lag in the event showing up. If you check GA4 the next day, it’ll be there.
About the Author
Andrew McMenamy
A natural problem solver with 9 + years of marketing experience building audiences across numerous verticals. Specialties include content, email, and performance marketing. Andrew graduated from Dowling College with a Bachelor’s in Business Administration in Marketing Management.
Follow me on Linkedin and
Quora.